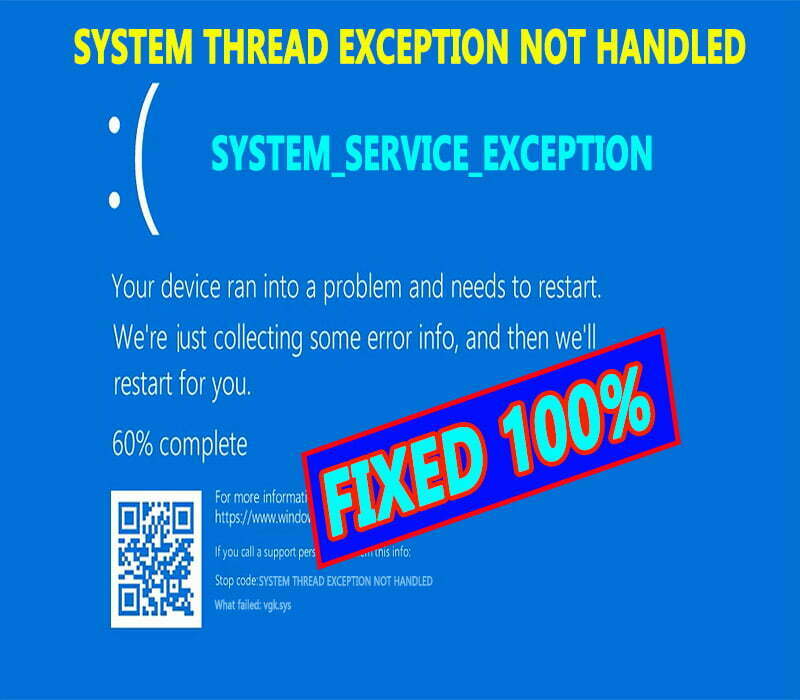
How to Fix Your Device Ran into Problem & Needs to be Restart. SYSTEM THREAD EXCEPTION NOT HANDLED. Windows 11 & 10
On this topic, I will show you a specific solutions and exclusive methods to fix blue screen boot loop in windows 11 and windows 10 with this error message: “Your Device Ran into a Problem and Needs to be Restart”,
Stop code: “SYSTEM THREAD EXCEPTION NOT HANDLED“, “PAGE FAULT IN NONPAGED AREA”, or “SYSTEM_SERVICE_EXCEPTION”.
This blue screen of death (BSOD) is usually associated with a failure in one of the following system files:
- fltmgr.sys
- dxgmms2.sys
- Ndis.sys
- ntfs.sys
- vgk.sys
- nvlddmkm.sys
I will show you many solutions for this issue, so you have to determine which solution that can be worked according to the error source and the system integrity in your computer. However, you can try all of them one by one to see which one will help.
- WHAT ARE THE CAUSES FOR YOUR DEVICE RAN INTO A PROBLEM AND NEEDS TO RESTART?
- HOW TO BOOT INTO ADVANCED RECOVERY MENU:
- FIRST SOLUTION: UNINSTALLING LATEST WINDOWS UPDATE:
- SECOND SOLUTION: REMOVING PROBLEMATIC DRIVER OR APP:
- THIRD SOLUTION: RESTORE YOUR SYSTEM TO PREVIOUS STABLE POINT:
- FOURTH SOLUTION: DISABLING SYSTEM RESTART AFTER FAILURE:
- VIDEO:
WHAT ARE THE CAUSES FOR YOUR DEVICE RAN INTO A PROBLEM AND NEEDS TO RESTART?
generally, there is no a specific source for blue screen of death boot loop errors, however, it may happen after installing incompatible windows updates, windows components or incompatible drivers in Windows 11, Windows 10 or in Windows 8 as well.
Also due to variation in error messages that appear next to “Your Device Ran Into a Problem and Needs to Restart”, such as memory management, bad system config info, SYSTEM_SERVICE_EXCEPTION, SYSTEM THREAD EXCEPTION NOT HANDLED, or PAGE FAULT IN NONPAGED AREA, determining the exact source is really hard. However, the following are a possible but not the definite identified sources for the each corresponding system file error:
- Ntfs.sys: with or without SYSTEM_SERVICE_EXCEPTION: is usually related to RAM or disk corruption, bad sectors, as well as the conflicting antivirus app.
- Ndis.sys: is commonly associated with a viral or malware infection.
- fltmgr.sys: is related to RAM or disk corruption.
- nvlddmkm.sys: is a Nvidia-related issue.
- vgk.sys: with or without Vanguard not initialized error: is a common driver-related error in the Valorant, Call of Duty or similar games.
- dxgmms2.sys: is a network-related issue. As indicated by the video below, it also associated with virtual network adapters, such as VMware Workstation, Virtual Box or other virtualization apps.
HOW TO BOOT INTO ADVANCED RECOVERY MENU:
Simple method:
- To boot into Windows Recovery Environment, do the followings:
- Force stops the computer by pressing Power button for 7 seconds
- Power it on again
- Once you see the spinning dots with or without Windows logo, press and hold the Power button down for 7 seconds or until the computer shut down completely.
- Repeat previous steps for two additional times or until you see Preparing Automatic Repair, or Diagnosing your PC, or Please Wait in your computer screen.
- After doing previous steps properly, the computer should be boot into either Automatic Repair screen or Recovery screen.
- If your computer booted into Automatic Repair screen, select Advanced Options, and if it booted into the Recovery screen, See Advanced Repair Options to proceed to the next Recovery menu.
- Select Troubleshoot option and then select, Advanced Options to open Windows Recovery Environment (WinRE). From this menu, you can apply all suggested solutions.
____________________________________
Booting from USB:
If you are unable to boot into Windows Recovery Environment, you will need a bootable USB of Windows 11 or windows 10. Read this topic to learn how to create a bootable USB in your mobile.
- After creating the bootable USB, connect it to your computer while it is in power off state
- Power on the computer
- Once you see the manufacturer logo, press f12 repeatedly to open Boot menu.
This is the list of short keys used to open Boot menu in most common laptops’ brands:
- Acer: F12, F9 or Esc.
- Asus: Esc or F8
- COMPAQ: F9 or Esc.
- Dell: F12
- Fujitsu: F12
- HP: Esc or F9
- Lenovo: F12, F8, F10, Novo Button or Fn+F11
- MSI: F11
- Razer Blade: F12
- Samsung: F12 or F2
- Sony: Assist Button, Esc or F11.
- Toshiba: F12
4. Once you are in the Boot menu, select the USB drive from the list and then press Enter to boot from it.
5. Press any key immediately to continue if you asked for
6. Select English language from the list and then press Next.
Read this topic for more details about how to boot from the bootable USB.
7. Select Repair Your Computer option and then Select Troubleshoot option to open Advanced recovery Menu.
8. Select Command Prompt from the menu.
9. Execute the following command to add Safe Boot Mode into Boot Configuration Data (BCD) file:
BCDEDIT /SET {DEFAULT} SAFEBOOTNotice that we have used “Default” instead of “Current” when executing BCDEDIT command from Windows Recovery Environment.
Now and after booting into Safe Mode, you can try troubleshoot your issue and then apply the most specific solution from the next methods.
FIRST SOLUTION: UNINSTALLING LATEST WINDOWS UPDATE:
Usually, Microsoft deliver the recent updates to all widows and other Microsoft apps such as Microsoft Office, but some of these updates may interfere with installed drivers or apps, or maybe with the computer itself if the computer is very old. Although Microsoft may release a new update or patch to fix the emerged issue from previous update, it may not release fix or may delayed the release, if the is no enough reports from users about that issue.
If you think the error appears after latest windows update, try to remove it as followings:
- From Windows Recovery Environment or Advanced Options menu, click on Uninstall Updates option
- You well get two options, Uninstall Latest Quality Update, and Uninstall Latest Feature Update.
- Select Uninstall Latest quality update.
- From shown message, click on Uninstall quality update to confirm your selection.
- Click Done and then select Continue to boot into windows 11 or windows 10 operating system.
- Note: Your files will not be affected by this solution.
- If your issue not fixed after removing recent quality updates, back to Advanced options and select Uninstall Update option again
- Select Uninstall Latest Feature Update to remove the most recent feature update.
- If removing Latest windows update after trying both options failed to proceed or didn’t fix the issue, try another method from the next solutions.
Important Note: This process may take several minutes, so make sure your laptop is fully charged or plugged in to electric source, to avoid further system corruption in case of shutting down while this process in progress.
SECOND SOLUTION: REMOVING PROBLEMATIC DRIVER OR APP:
- From Advanced options’ menu, select Startup Settings and then click on Restart
- Once you are on Startup Settings menu, press F4 key from keyboard to boot into Safe Mode with minimal options, or press F5 key to boot into Safe Mode with networking.
- After booting into Safe Mode, right click on Start menu and then select Event Viewer option
- Expand Windows Logs and then select System option.
- Scroll down to locate the recent Critical event.
- Critical event indicates that the computer rebooted automatically due to a sever system failure.
- Note: If there is no Critical event record, try to boot your computer or to open the app that cause auto restart many times until you see the Critical event.
- See what is the previous event below the Critical error that failed to start, to know what is the driver or app that led to system failure.
- As you will see on the video later, in my computer the Adapter driver of VMware Virtual Network is the source of blue screen error, because it is the last event executed before appearance of critical event.
- Also, you will notice that all previous events below VMware event executed successfully.
- After determining the error source, open Device Manager and remove the problematic driver that you have identified as on previous step.
- Open Control Panel and then start Device Manager, or right click on Start icon, and then select Device Manager.
- Click on View panel and then select Show Hidden Devices option.
- Locate the problematic driver and remove it.
- In my case, I will remove all drivers related to VMware workstation app, because it interfered with the recent windows update.
- If the blue screen error appears after updating a specific driver in your computer, you can try to remove that update only without removing the entire driver as followings:
- Double click on the problematic device to open Properties
- Navigate to Driver panel and then click on Roll Back Driver to restore previous version
- Select one reason for rolling back and then click on Yes to confirm your changes.
- Alternative method to removing the entire driver is to just disable it and then restart your computer to see whether the problem fixed or not.
- Now, restart your system to see whether the issue fixed or not.
After a successful boot without blue screen error, you have to install the old driver if the issue appears after updating the driver, or search for a compatible and updated driver from the official manufacturer website of your laptop using service tag number. Read this topic for more details about using Service Tag number to download the correct drivers.
THIRD SOLUTION: RESTORE YOUR SYSTEM TO PREVIOUS STABLE POINT:
- If the System restore was enabled in your computer before appearance of problem, you have a high chance to get rid of System Thread Exception Not Handled error easily.
- To restore your system, do the followings:
- From recovery menu, select System restore option and then click on Next.
- Check Show more Restore Points if you have many restore points.
- Select restore point that has been created before appearance of your boot error and then click Next.
- Select the partition or drive that contains windows only and then click on Next.
- Click on Finish and then click on Yes to start restoring process.
- Your files will not be removed when applying all suggested solutions properly, including system restore solution.
- Click on restart to restart into desktop.
FOURTH SOLUTION: DISABLING SYSTEM RESTART AFTER FAILURE:
If your computer restarted after a successful boot, then this method will help you
You can disable Automatic Restart After System Failure using one of the following methods:
Method Number 1:
Open Command Prompt and type this command:
WMIC RECOVEROS SET AUTOREBOOT = FALSEMethod Number 2:
To disable Automatic Restart After System Failure from Startup Settings, press F9 key from keyboard.
Method number 3:
To disable Automatic Restart After Failure, boot into safe mode by pressing F4. In Safe Mode, press Windows + R keys to open Run tool
Type the following command without space:
SystemPropertiesAdvancedPress Enter to open Advanced System Properties
Click on Settings button under Startup and Recovery option
Under System Failure option, uncheck Automatic Restart option and then click Ok to save changes.
If your computer rebooted to blue screen before login, then you can try to disable Driver Signature Enforcement by pressing F7, or to disable Early Launch Anti-Malware Protection by pressing F8 to see if they can help.
You have to enable these options after determining and fixing the root cause of System Thread Exception Not Handled, as they have a protective role against dangerous errors that may lead to sever corruption in your system or computer or both.
It’s worth noting that some or all methods may fail to proceed if there is a corruption in the system files. In this case, you have to restore system health using the following two commands:
DISM /Online /Cleanup-Image /RestoreHealthsfc /ScanNowAfter finishing system scan, try the suggested solutions again.
Finally, if you still need a help, you can add a question in comments and we will try to help you. But you have to include everything you know about the error, such as the blue screen error message and error code, whether the blue screen appears before or after login, or while using a specific app or game, or after installing or updating a specific driver.
VIDEO:
For detailed show in how to fix System thread exception not handled in windows 11 or windows 10, watch this video:

How to Fix Hard Disk not Showing While Installing Windows 11 & 10
How to Install and Use RTL8187 Driver of Alfa Wi-Fi Adapter in Windows 11 & 10
