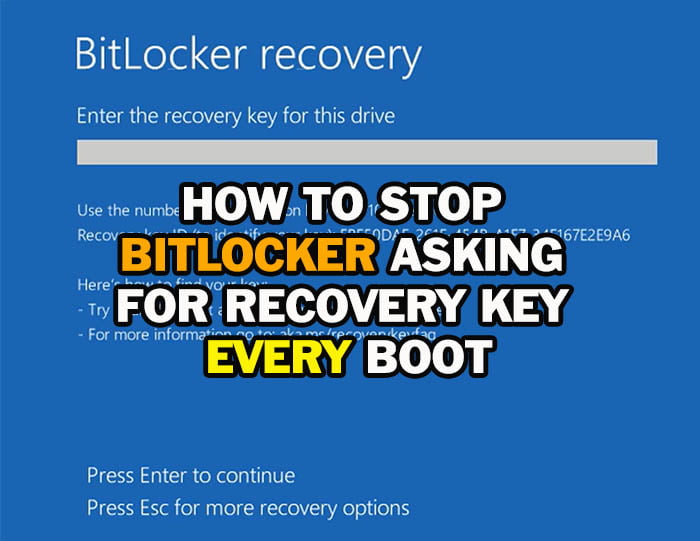
How to Stop BitLocker Asking for Recovery Key Every Boot or Startup Windows 10 & 11
BitLocker is a Microsoft encryption technique in windows 10 and windows 11 that can be used to protect your data from unauthorized access. If you have done any hardware changes or firmware updates, and in some situation windows updates, you will be asked to enter the BitLocker recovery key for one time. However, if the BitLocker keeps asking for recovery key at startup, that mean there is a wrong with windows 10 or windows 11, or maybe there is a hardware or BIOS issues that should be corrected in order to stop BitLocker recovery key required every boot.
On this topic, I will show you how do I stop BitLocker asking for recovery key, in order to bypass BitLocker recovery blue screen boot loop each startup in windows 11 and windows 10 operating systems.
NOTE 1: This video will help you if the BitLocker keeps asking for recovery key every boot even after entering the correct recovery key, however, if you don’t have the recovery key, then read this topic to learn how and where you can find the recovery key, or read this topic to learn how to bypass the BitLocker recovery without password or recovery key.
First Part: How to Unlock BitLocker Drive from Recovery Environment?
If you are unable to stop BitLocker loop from first BitLocker recovery blue screen, then try to enter the recovery key from Windows Recovery Environment (WinRE) as followings:
- Press Esc key from keyboard to open Advanced Recovery blue screen
- Press F1 if you asked for, to open Advanced recovery blue screen.
NOTE 2: If your computer boot into “Your PC/Device Needs to be repaired” blue screen instead of booting into recovery menu, that mean the BCD is corrupted or recovery is disabled in your computer. So you have to create a bootable USB in your mobile or in another computer. After that, boot your computer from that bootable USB into Advanced recovery menu.
- Once the PC booted into second BitLocker recovery blue screen, type the recovery key and then click on Continue to unlock the BitLocker encrypted drive.
- Click Restart to restart your computer into login screen
NOTE 3: If you have more than one encrypted partition, you will see an error message saying that the drive specified is not the operating system drive. To fix that, you have to unlock all encrypted drives and then suspend the BitLocker using command prompt as instructed on the next part.
How to Unlock BitLocker Drive from Command Prompt?
If you failed to unlock the BitLocker from recovery blue screen or the BitLocker Recovery Loop not fixed, then you can unlock it using CMD as followings:
- From BitLocker Recovery blue screen, Press “Esc “key from keyboard and then click on “Skip This Drive” to boot into the Advanced Recovery Environment.
- Click on “Troubleshoot” option and then select “Advanced options” option
- Open the “Command Prompt” and then click on “Skip this Drive” if you asked to do so
- Type the following command to determine the letter of encrypted drive:
- MANAGE-BDE -STATUS
- If you have more than one locked partition, you have to unlock all of them one by one
- To show the BitLocker recovery key ID or Identifier of locked partition, for example the C partition, use this command:
- MANAGE-BDE -PROTECTORS -GET C:
- Replace the C with the letter of other partitions if you have more than one locked partition
- MANAGE-BDE -PROTECTORS -GET C:
- If you have the text file of BitLocker recovery key in a USB drive, connect the USB to your computer and then open the BitLocker text file using notepad app as following:
- Type “Notepad” and press Enter
- Click on “File” tab and select “Open” option
- Navigate to the text file inside your USB drive and open it
- If the identifier number is matching the shown ID in the CMD, then type this command followed by the recovery key, after that press enter to unlock the BitLocker encrypted C drive:
- MANAGE-BDE -UNLOCK C: -RP
- If you have more than one locked partition or drive, open the BitLocker text file for each partition and unlock it one by one using the same command, but make sure to use the correct recovery key and the correct partition letter.
- After unlocking all partitions, you have to Suspend or turn off the BitLocker encryption for all encrypted partitions as instructed on the next part.
Second Part: How to Stop BitLocker Loop by Suspending Protection?
Suspending or turning BitLocker protection Off and then reenabling it can help in fixing the BitLocker recovery loop. This can be done either by searching for BitLocker and then opining Manage BitLocker tool in running windows, or by executing Manage-BDE commands from Command Prompt or CMD.
How to Suspend or Turn off BitLocker Recovery Loop from CMD?
- To suspend BitLocker protection from CMD, type the following command followed by the letter of encrypted partition (add C: to unlock the partition):
- MANAGE-BDE -PROTECTORS -DISABLE C:
- Suspend protection in all encrypted partitions one by one using the same command.
- To turn off BitLocker from CMD, type this command followed by the letter of encrypted partition:
- MANAGE-BDE -OFF C:
- Notice that the decryption takes longer time, so you have to wait until the Percentage Encrypted reach 100 % before restarting the computer.
- Also notice that you can show the BitLocker Recovery key once the partition gets unlocked using MANAGE-BDE -PROTECTORS -GET C: command.
- In running windows, you have to open the Command Prompt as administrator in order to execute MANAGE-BDE commands successfully.
- Now, close the Command prompt window and then click on Continue to Windows 11 icon to restart your computer into login screen.
- After logging into your desktop, search for BitLocker and open “Manage BitLocker” app
- click on Resume Protection to reenable BitLocker encryption
How to Suspend or Turn off BitLocker Recovery Loop Using Manage BitLocker App?
- Once your computer booted into desktop, type BitLocker into search box and then open “Manage BitLocker” app
- Click on “Suspend Protection” to pause the BitLocker protection temporarily.
- To disable BitLocker recovery permanently, click on Turn off BitLocker option.
- Restart or shut down your computer to apply the new changes
- After restarting, open “Manage BitLocker” app again and resume the BitLocker encryption if you want by clicking on Resume Protection.
- Now, your computer will not ask for BitLocker key again, unless you do a hardware or firmware changes or any changes that trigger BitLocker recovery in future.
Third Part: How to Disable BitLocker Loop from BIOS Settings?
If the previous suggestions not help you to stop BitLocker Recovery loop every time you start up your computer, then can try to fix that from BIOS settings using one of the followings suggestions after openning BIOS Menu.
How to open BIOS Menu?
Press Esc key to show additional recovery options
Press Esc again to go to UEFI or BIOS settings
Also you can press the F2 key repeatedly after powering on the computer to open BIOS settings
This is the list of the most common keys to open BIOS settings for different desktops and laptops:
1. Enabling Secure Boot
- Navigate to Security tab and then enable Secure Boot option.
- In Asus and other laptops with Megatrend BIOS firmware, click on Advanced mode and then navigate to Security tab to enable the Secure boot.
- Navigate to Exit tab and select Exit Saving Changes option or press F10 from keyboard to apply new BIOS changes.
2. Disabling Boot Support and Pre-Boot Options for External Storages:
- If you have Dell or another computer with BIOS similar to Dell BIOS, you have to Disable Boot Support and Pre-Boot option for external USB, USB Type-C and Thunderbolt 3 (TBT) drives as followings:
- Navigate to System Configuration and then select USB Configuration
- Disable Boot Support
- If there is an USB Pre-Boot option, disable it too
- Navigate to Thunderbolt Configuration or “Thunderbolt 3 (TBT)”
- Disable “Thunderbolt boot support” and “Thunderbolt Pre-boot Modules”
- Enable “Security level – No security” option
- Navigate to “USB Type-C” tab
- Disable “USB Type-C boot Support” and “USB Type-C Pre-boot” options if available.
- Navigate to “Miscellaneous Devices” tab
- Disable “Secure Digital SD Card Boot” option
- Navigate to System Configuration and then select USB Configuration
3. Disabling UEFI Network Stack:
- Also search for UEFI Network Stack and disable it.
4. Changing Fast-Boot Behavior
- Expand “POST Behavior” option
- Open “Fastboot” tab
- Enable “Thorough” option
- Click on “Apply” icon to apply new changes.
5. Enabling the Trusted Platform Module (TPM)
- If the Trusted Platform Module or TPM is disabled in your computer, you have to enable it in order to stop BitLocker Recovery Loop as followings:
- Navigate to “Security” tab
- Enable the TPM or PTT option
- Disabling TPM in BIOS while the BitLocker is enabled in windows settings is the most common trigger for the BitLocker Recovery loop in most computers, because the decryption data will not be available to unlock the BitLocker-encrypted drive automatically.
- It’s worth noting that the TPM configuration may take another name in some computers, for example, it may be named PTT in some Intel motherboards, or fTPM in some AMD motherboards.
- In Lenovo and other laptops with BIOS settings similar to Lenovo BIOS, the TPM can be turned on by changing the “Security Chip” to Enabled under Security tab.
- After enabling the TPM click Apply icon or press F10 key from keyboard to save new changes.
6. Doing a BIOS Reset to Default:
If you have done any changes in BIOS Settings that lead to the BitLocker Recovery loop but can’t remember that changes, then you can reset the BIOS to Factory Settings or BIOS Defaults in order to bypass the BitLocker Boot loop. However, this could be the source of BitLocker error or may lead to a new issue, especially if your BIOS customized to support new hardware upgrades. Therefore, if you have decided to do a BIOS reset, you should take a video for the entire BIOS setup using your mobile or another camera before doing BIOS reset, so you can revert settings back if you advanced into a new problem.
On Phoenix or American Megatrends BIOS firmware, you can press the F9 key to reset BIOS settings to defaults.
Fourth Part: Additional Suggestions:
a. Disconnecting external storages:
If there is any external storage like DVD, USB drive or SD card connected to your computer, you have to disconnect it before booting, as these drives can trigger the BitLocker recovery, especially if they contain boot configuration files.
b. Replacing CMOS Battery:
There is a coin-size battery on every computer called CMOS. This battery helps the BIOS to store the hardware settings, such as date and time, and BitLocker configuration data.
If the CMOS battery is corrupted or expired, then you have to replace it with new one.
c. Updating BIOS or UEFI Firmware
Updating the BIOS firmware can help in fixing BitLocker loop and other computability issues. To update your BIOS, you have to turn off the BitLocker encryption first. Then search for the correct update file from the manufacturer official website of your laptop and download it to your computer. After that, send the update file or folder to a USB drive pre-formatted in NTFS file system, so you can update your BIOS from that USB drive.
For more details about updating BIOS firmware, read this topic.
d. Disabling Then Reenabling BitLocker and TPM:
If all previous suggestions not helped, you have to disable the BitLocker protection, then disable the TPM and enable Clear option or Clear Security Chip option to clear the TPM data. After that, click Apply or press F10 to apply changes. Back to BIOS settings and enable TPM and disable or uncheck clear option, after that, boot into windows desktop and reenable BitLocker encryption.
Notice that the BitLocker identifier and recovery key will be changed to new ones, so make sure to export the BitLocker key into safe place.
e. How to turn off auto unlock in Windows 11 or Windows 10?
In some old computers, the second partition can lead to BitLocker Recovery Loop if the encryption is enabled on that partition. So you can try to disable or Enable the BitLocker Auto Unlock of that partition.
- To disable the BitLocker Auto Unlock for any partition, for example the E partition, run command prompt as administrator and then execute this command:
- Disable-BitLockerAutoUnlock -MountPoint “E:”
- Replace the E with the letter of encrypted partition in your computer
- Disable-BitLockerAutoUnlock -MountPoint “E:”
- To Enable the BitLocker Auto Unlock for any partition, for example the E partition, run command prompt as administrator and then execute this command:
- Enable-BitLockerAutoUnlock -MountPoint “E:”
- NOTE: These commands will not work if you are trying to disable or to enable auto unlock for “C” or windows partition.
VIDEO:
For more details about how to stop BitLocker from Asking for Recovery Key every startup watch the following video with illustrated show step by step: