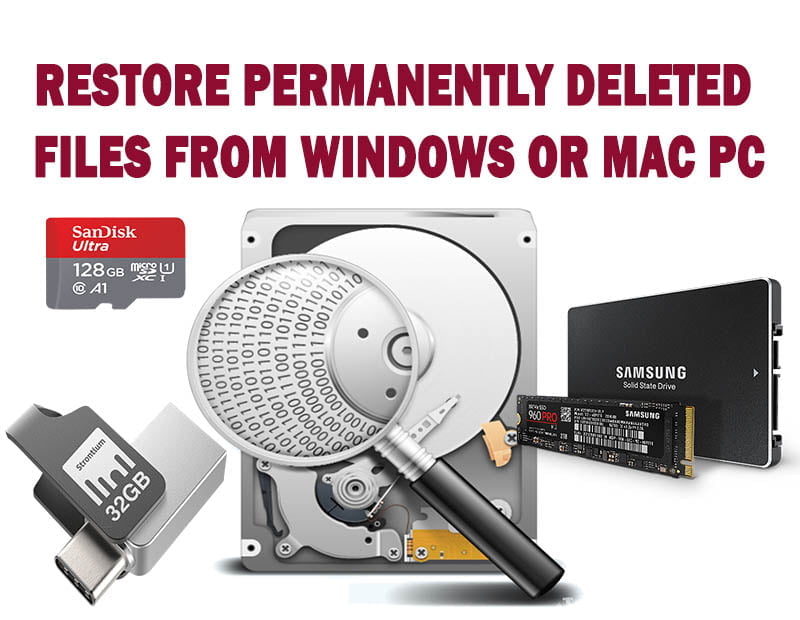
How to Recover Permanently Deleted Files in Windows or Mac
On this topic, you will learn how to recover permanently deleted or lost files from internal or external storage, including formatted or corrupted disks using FoneLab Data Retriever app in windows 11, windows 10, windows 8, windows 7 or in Mac computers.
As it is known that deleted files can be easily recovered from the Recycle Bin by clicking on ‘Restore All Items‘ option without need for programs or tools. But if the files were deleted permanently, for example by pressing the “Shift + Delete” keys from keyboard, or when the recycle bin was emptied after files deletion, on such cases, you won’t be able to retrieve the deleted files without using a third-party app.
There are many data recovery apps that share the same functions and recovery scenarios, but what amazed me about FoneLab Data Retriever app is its superior ability to recover all deleted files of any kind, whether from visible or hidden partitions or even from corrupted storages. In addition, this wonderful program can restore lost files from a computer that failed to boot, as this app is distinguished by its ability to run and scan for deleted files even when it is launched from the Advanced Windows Recovery Environment.
Even though FoneLab Data Retriever app is used to recover lost data on windows or Mac computers, a variety of other devices and media storages are supported by this app too. For example, you can recover lost images or videos from Digital Camera Camcorders such as Canon, Sony, Panasonic and other camcorders. Flash drives such as SanDisk, Samsung, Kingston and other pin drives. Memory cards such as SD card, Micro SD card, Mini SD card. External hard drives such as SSD or HDD drives.
Not only will you recover mistakenly deleted files, but also recovering lost files due to different scenarios, such as viral attack, crashed device, wrong operation, formatted storage, corrupted drive, pulling out SD card while the camera is on and many more Recoverable scenarios; However, on this topic I will show you only some unfamiliar retrieving scenarios and unique features of FoneLab Data Retriever app, including tips and tricks for effective recovery.
- HOW TO RETRIEVE DELETED FILES FROM RECYCLE BIN AFTER EMPTYING?
- HOW TO RECOVER DATA FROM HIDDEN OR LOST PARTITION?
- HOW TO RETRIEVE FILES FROM MOBILE OR CAMERA MEMORY CARD?
- HOW TO RECOVER LOST DATA FROM FORMATTED DISK?
- HOW TO USE FILTER TO NARROW RECOVERY RESULTS BY FILE SIZE, FILE EXTENSION, CREATION AND DELETION DATE?
- TESTING RECOVERABILITY OF FOREIGN FILES’ EXTENSIONS:
- HOW TO RECOVER LOST DATA FROM A COMPUTER’S HARD DISK THAT WON’T BOOT?
- HOW TO INSTALL AND ACTIVATE FONELAB DATA RETRIEVER APP?
- VIDEO:
HOW TO RETRIEVE DELETED FILES FROM RECYCLE BIN AFTER EMPTYING?
- FoneLab Data Retriever app
- Select Recycle Bin from the available options in the main menu of the app
- Choose data type if you want, otherwise, enable Check All File Types option to scan for everything
- Click Scan to start scanning for deleted files.
- If the number of recovered files is unsatisfying, try Deep Scan, but it will take longer time, as this scanning technique will search for recycled files in all connected disks and partitions deeply.
- On this computer, I have one terabyte HDD drive divided into three primary partitions, and a 250 gigabytes SSD drive divided into 2 partitions, so it takes about 14 hours to scan all of those partitions. But in deep scanning, the total number of the recoverable files is about 1.5 million files on the 5 partitions, in addition to 372 files on the hidden partitions. So it’s worth waiting, especially if you are retrieving files from the entire disk due to disk corruption.
- Once the deep scanning is completed, expand all partitions one by one to preview the recovered files or to select the desired file or group of files to restore, or use search box to search for that file.
- Files with red color indicates that the file recovered from lost path
- To search for a specific file by its name, you have to select the partition from which the file was deleted.
- After that, type the full name or the first letters of the file name if it has a unique name, after that, press Enter from the keyboard to start search.
- To restore a file or group of files, select them and then click Recover icon
- Navigate to the partition with enough free disk space in which you want to save recovered files. It’s recommended that you have to save your files to a different partition other than the partition that you are recovering lost files from.
- The folder will be opened automatically once the recovery process is completed.
- It’s worth noting that this method will help you to recover lost files due to emptying Recycle Bin or to recover files that you have deleted using the Shift + Delete method too.

TESTING THE FUNCTIONALITY OF RECOVERED FILES:
If you are planning to recover a specific file or group of files instead of recovering the entire discovered data, you have to test files’ health status or functionality before closing the FoneLab Data Retriever app. This step will help you to search for a different copy of the corrupted file from the current scanning results instead of rescanning the entire disks.
Notice that you can sort discovered files by modification date, creation date, size, or by file’s names.
In case of images, you can change preview type and then check its health status inside the app before recovery to internal storage. But in case of videos or other files, you have to recover them first.
After recovering lost files, navigate to the recovered folder and test them one by one to see if they can be opened or not. This will help you to search for another copy of the corrupted file or group of files in another partition or on Others folder of the same partition. Also some recovered files may take a numeric name rather than its original name.
HOW TO RECOVER DATA FROM HIDDEN OR LOST PARTITION?
System and recovery partitions don’t contain an assigned letter like other partitions, so they are hidden in File Explorer by default.
- To recover data from a hidden partition do the followings:
- Select the hidden partition from the list of Hard Disk Drives or slide to the left if not shown. You can identify it by the asterisk instead of a letter or by the orange color instead of blue color in the main menu of the app.
- The app also can recover data from lost or unallocated space, which usually has a RAW format.
- After selecting the hidden or lost partition, click on Scan
- Click Deep Scan to discover more deleted files
- Check first tree branch under Deep Scan to select all discovered files, after that, click on Recover button
- Select a destination folder in which you want to save recovered data
- All data on the hidden partitions are system files, so you can’t preview them without installing additional apps or tools.
HOW TO RETRIEVE FILES FROM MOBILE OR CAMERA MEMORY CARD?
- If you have lost your files from the external memory card of your mobile or camera or whatever, you can retrieve them easily as followings:
- Connect the memory card to your computer using a memory card adapter and then start the FoneLab app.
- Select the memory card from the list of removable drives
- Select the file type if you want to scan for specific files, otherwise, select Check all file types options to scan everything.
- Click Scan option to start the quick scanning process.
- As you can see on the video, the app was able to recover 750 lost files of about 40 GB in less than ten seconds using only the quick scan, despite the fact that the memory size is only 32 GB, meaning that the size of the recovered files is greater than the actual memory size. The reason for this is that the memory was not exposed to formatting previously. But if the memory card gets formatted, you may not be able to recover the lost files unless you have used the deep scan, especially if there are no added and deleted files from the memory after the formatting.
- Select the desired file or group of files to be recovered and then click on Recover to restore the files to internal storage.
- If the required files did not retrieved or retrieved but can’t open when using Quick Scan, back to FoneLab app and then click on Deep Scan hyperlink to start deep scanning process.
- As you can see on the video, the Deep Scan takes longer time, but all retrieved images are viewable in compare to Quick Scan results.
HOW TO RECOVER LOST DATA FROM FORMATTED DISK?
- Connect the formatted USB drive to your computer
- Start the FoneLab Data Retriever app
- Select the USB drive from the list of removable drives
- Select the file of type if you want to recover a specific type of files, or enable “Check All File Types” option to recover everything.
- Click “Scan” to start scanning for lost files
- Notice that you can explore folders and preview retrieved files during scanning processes.
- As you can see on the video, the app recovers 906 files after formatting, compared to 1894 files before formatting, but it is still representing a significant number for recovered files from a formatted disk.
HOW TO USE FILTER TO NARROW RECOVERY RESULTS BY FILE SIZE, FILE EXTENSION, CREATION AND DELETION DATE?
Sometimes the lost file can’t be identified easily, especially if there are a huge numbers of recovered files with similar name and extension to the desired file, or if you can’t remember the file name.
In this case, you can use Filter option to narrow your search result so you can identify the desired file or group of files easily and quickly.
- To do that, select the Disk or partition if you have scanned in all available partitions
- Click on Filter Icon
- Type the file type or extension on the first box
- Type the minimum and maximum predicted size limit of the file in megabytes or gigabytes or whatever
- Select the Created Date or Modified Date option if you can remember the creation or modification date for the desired file, otherwise click apply or press Enter to start the searching process using extension and size filters only.
- Also there are options to filter search results using a specific range of months, days and hours of the file’s creation or modification.
- After customizing the search result, click apply to starch searching for your file with all of your customizations. However, using month, day and hour filters may not work properly if you are using it after a disk formatting, as the recovered files will be considered as newly created files.
TESTING RECOVERABILITY OF FOREIGN FILES’ EXTENSIONS:
The owner of FoneLab Data Retriever app mentioned many file types and extensions that can be recovered by the app. This may indicate that unmentioned extensions are not supported by the app.
To check this limit, I have changed the file type of some files to foreign extensions with and without compression to see if the app can retrieve them or not. So if the app can recover those foreign files after manipulation, then the app has no limit for the number and type of supported files.
After changing the files’ extensions, I deleted the entire folder and its contents permanently by pressing Shift + Del keys.
Then, I opened the FoneLab Data Retriever app and tried to recover deleted files.
The result was that the deleted files retrieved very fast using Quick Scan without doing Deep Scan as shown on the video below.
By exploring the folders’ content, you can notice that some files recovered twice, in which the first copy with its original extension, while the second copy recovered with its manipulated extension.
To confirm the functionality of the recovered files, they have to be restored to a local folder.
As you can see on the video, the foreign files recovered, and they are intact and working too!
HOW TO RECOVER LOST DATA FROM A COMPUTER’S HARD DISK THAT WON’T BOOT?
- If you have the FoneLab Data Retriever app already installed on the corrupted computer, you can run the app in windows recovery environment easily as followings:
- Open command prompt
- Type Notepad and press Enter
- From File tab select Open option
- Click on This computer icon and then navigate to the Windows partition, which could be the C or D or another partition.
- Open Program Files folder and then open FoneLab folder
- Open FoneLab Data Retriever folder and then change file of type option to All
- Right-click on FoneLab Data Retriever.exe file and then select Run as Administrator option
- As you can see on the video, the app started successfully from Windows Recovery Environment, but it asks for an email and activation key to register and activate the app despite it being activated on my computer.
- Also you can select any partition and then click Scan to start scanning for the lost files, but you will not be able to restore discovered files unless you have added the activation key.
Note: Until the publication date of this topic, internet connection is required to register and activate the FoneLab Data Retriever app, and windows recovery environment does not support the network connection without hard modification. However, the app publisher may publish a portable version of the app that can be extracted into a bootable USB with an option for offline or telephony activation in future.
- Read this topic to learn how to boot into Advanced Recovery Environment.
- Read this topic to learn how to fix “You Need to Format the Disk in Drive” OR “Please Insert a Disk Into USB Drive“
HOW TO INSTALL AND ACTIVATE FONELAB DATA RETRIEVER APP?
If you are interested on FoneLab Data Retriever app, you can download and install it easily from the official page using this link. The app has many Supported Platforms, such as Windows 11, Windows 10, Windows 8 and 8.1, Windows 7, Windows Vista and Windows XP. In addition, it can be installed on Apple or Mac computers as well.
After installing the app, you can purchase an activation key from the official website.
Note: All the prices of the plans currently offered are considered nothing when compared to the capabilities of the program, especially if we know that the cost of data retrieval at computer maintenance shops may reach twice the price of the program.
To activate the app, click on the activation or key icon in the upper right corner of the app
Enter your email in the first field and the serial number or registration code in the second field
After that, click Register icon to activate the FoneLab Data Retriever app.
The activation require internet connection in order for the registration to proceed.
VIDEO:
For more and illustrated details about How to recover permanently deleted files from Windows or Mac PC, watch this video: